Step 1: Remove the two lower 1/2" long button head hex screws on the face of the stand and partially remove the two upper screws, leaving approximately 1/4" of the threading exposed (Figure 01.).
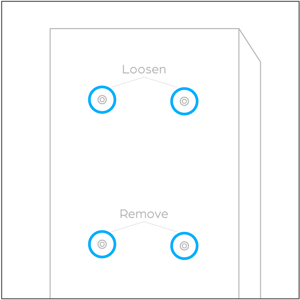
Figure 01.
Step 2: Carefully hang the Swift UV on the two upper screws taking care to align them with the two mounting points on the back of the Swift UV (Figure 02.).
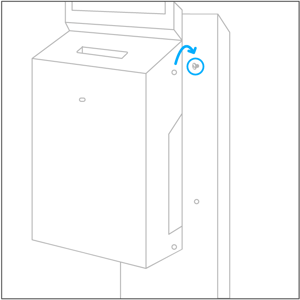
Figure 02.
CAUTION: Ensure that the Swift UV is fully seated on the two screws.
Step 3: Loosen the two recessed screws on the right side of the Swift UV's main housing with the provided Phillips screwdriver and rotate the main housing open (Figure 03).
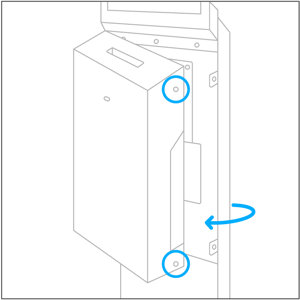
Figure 03.
Step 4: Reinstall the lower right screw and tighten the two upper screws (Figure 04.).

Figure 04.
Step 5: Loosen the two thumbscrews on the right side of the disinfection chamber. Rotate the fan duct out (Figure 05.) then rotate the disinfection chamber out to gain access to the back panel (Figure 06.).
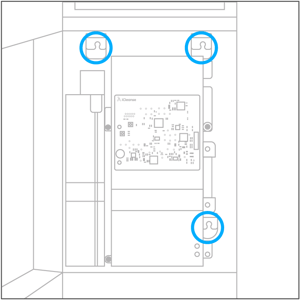
Figure 05.
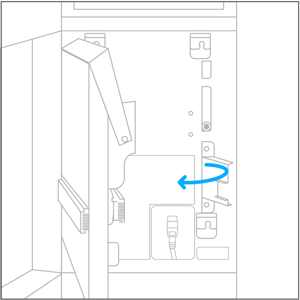
Figure 06.
Step 6: Reinstall and tighten the final screw in the lower left corner then reach into the access hole in the back of the Swift UV and plug the power cable into the power inlet terminal (Figure 07.).
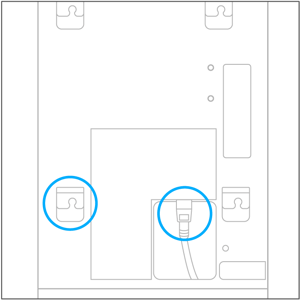
Figure 07.
Step 7: Rotate the disinfection chamber and fan duct back into position and secure the two thumb screws on the right side.
Step 8: Turn the power Switch to the "ON" position (I) (Figure 08.).

Figure 08.
Step 9: Close the main housing of the Swift UV and tighten the two recessed Phillips screws.
Step 10: Plug the power cord into a grounded receptacle.